Repair companies are completely right they don’t repair on this level of detail, but swap an entire board instead. Much easy-er. But I don’t have spare boards lying around and I like a challenge, so…
A friend of mine had a defective digital camera, someone forced the sd card in the wrong way, with bent contacts as a result. His camera now refused to read or write the card. Reseating the card didn’t help. Taking the camera apart and bending those contacts back to their original shape did help.
After removing ~20 tiny little screws the camera looks like this:
Might look terrifying because of all those little ribbon cable flex PCB’s, but I was able to put it all back together (I’ve done this sort of thing before).
O, and a warning for those that want to attempt this: Every camera with a flash contains a high voltage capacitor that probably is still charged. Discharge this capacitor before doing further work on the camera! (Or just don’t try this at home). In the picture above it is the big cap labelled “photo-flash”. It was charged to 140V.
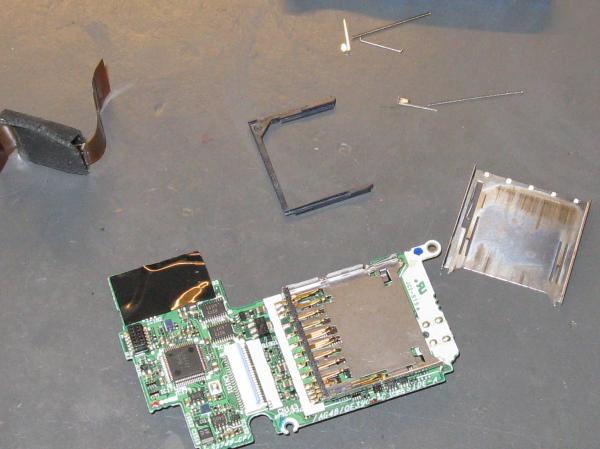
This is the removed SD card slot. Instead of replacing the SD card slot, I opened it up. It contains 2 little springs (held on pins) and a tiny little metal bar, that together with the plastic sled forms the mechanism that allows you to push on the sd card to pop it out. Those tiny parts can be seen in the top half of the picture.
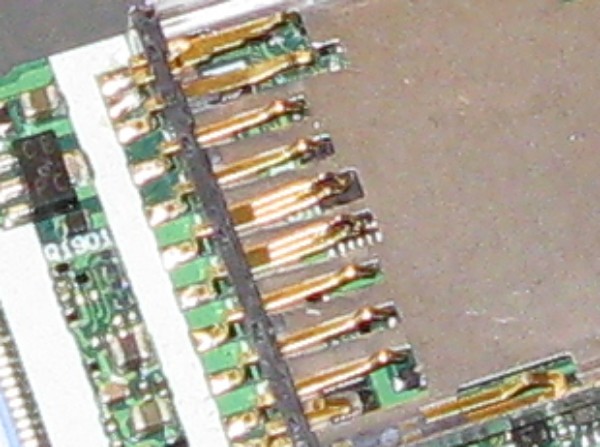
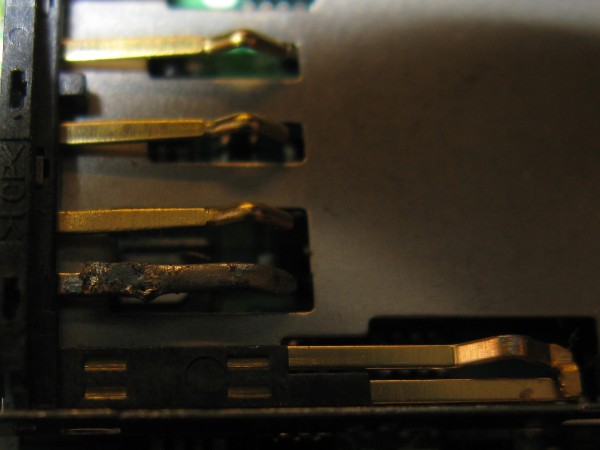
 In this detailed picture the bent pins can be seen. The second one from the top I already bent back, the one on the bottom broke when bending it to its original shape. So I had to either replace the entire SD card slot (Might be hard to find one with the exact same footprint, not to mention the mess de-soldering it would give on the PCB, with all these tiny components nearby), or find a clever solution.
So, I replaced the bent pin with a pin from a female pinheader connector, cut and bent to shape and soldered to the remains of the broken pin.
After re-assembling everything, the camera still refused the SD card. However, this time reseating the card helped and it could access the card again.
Parts cost: Near zero.
Labour: ~ 5 hours. Yes, that’s why repair companies can’t do this.
If I had to do this again it would cost less time, because now I know where all those hidden screws are. Still, it would take too much time if I had to do this commercially. But I repair for fun, to prevent waste and for the challenge of getting something broken to work again. This certainly was a challenge. Not on the intellectual electronic level, but on the fine mechanical skill level. And it was rewarding to get this camera to read (and write) its card again.


Leave a Reply